

You know, that head roll that SCAdians think is so Byzantine? You can buy them at Ren Fairs, they show up in commercial paper patterns. It basically looks like something you get at a medical supply store for bum cushioning.
Yeah, those.
Stop.
I know this sounds mean, but there is -zero- evidence that such a thing existed. Artwork from the early Byzantine period (300-899) shows -something-, and that something is called a fakiolion. It’s a turban, and it continues to be worn through the middle period, when art becomes more refined post-iconoclasm.
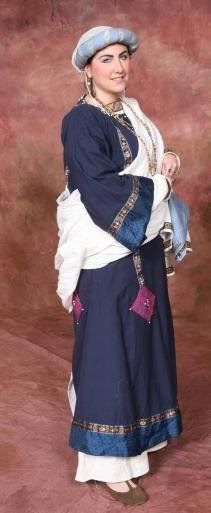
I’m far from innocent, of course. Here I am, 10 years ago and 50lbs lighter, wearing my hair donut in a photoshoot. This was my first attempt at Byzantine garb, which over all wasn’t bad, but if I could go back and beat myself with a hammer for the donut, I would. It was a waste of fabric and pillow fill that makes zero sense in the case of medieval construction.
Here is the cut from Theodora’s procession at San Vitale. I know you see the stripes, and think that it has to be ribbons and spangles and fancy things wrapped around a roll to get that effect. The fact is, that the same effect can be made with a turban with the right designs on it.
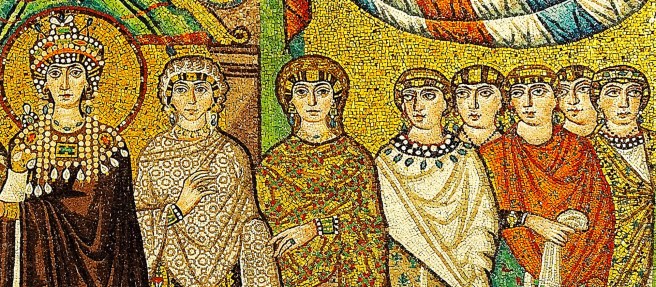
Then of course, there is the bust of the Byzantine Woman from the Metropolitan Museum of Art, believed to be Julia Amicia, Theodora’s zoste patrikia, shown as the third woman from the left above, you know, the one actually looking at us with her elegantly draped palla over her fakiolion. The front of this sure makes it confusing. Even I haven’t been able to completely figure out what that pucker is, but, thanks to my skills at museum yoga, I was able to get pictures of behind her head. As you can see, it’s definitely not a donut. It almost reminds me of how a St. Birgitte’s Cap gathers in the back of the head. I wonder if this piece was polychromatic at one point, and, if the Met plans on having it investigated for color residue. I feel any trace of color on the hairpiece would probably make it easier to interpret.


The use of a turban rather than a head roll provides multiple benefits. One, it doesn’t use up fabric and filling that could have been better served in other capacities. Two, it keeps the hair out of the face, and most importantly, CLEAN. The use of silk on the hair also helps protect set styles, and women still use silk wraps today to wear over their rollers and other curling implements to bed in order to control frizz and damage. It was not uncommon for a Byzantine woman to leave her hair uncovered, even as a married woman, and noblewomen would have had the option of affording hair services such as ornate braids and temporary “perms” made with gum arabic. The fakiolion would have helped keep these styles in place and relatively clean, versus having to constantly re-set the hair on a daily basis. A head roll would have been useless in any of these applications. While Byzantines were known for conspicuous consumption, even that seems off the mark.
Here is my Byzan-bestie, Konstantia, showing her interpretation from the same period. Note that the stripes in scarf used to create the turban gives the same effect as you see above from the mosaic. It looks so much more elegant than the donut, don’t you think? You can read her blog post pertaining to Byzantine headwear, here: https://kaloethina.wordpress.com/2016/10/01/headgear/

The trick, is to make sure that your fakiolion has the right grammata on it, or geometric designs. The Last Will and Testament of Kale Pakouriane describes these designs as being done in goldwork, and some scholars believe that grammata had pseudo-kufic script embroidered in, which was a popular design feature. Typically, you want the design to run parallel along the edges of the length of your turban fabric. Both Konstantia and I have found that commercially available hijabs do this nicely. And, since they’re designed to be worn on the head, they tend to not be stifling materials, and stay put.
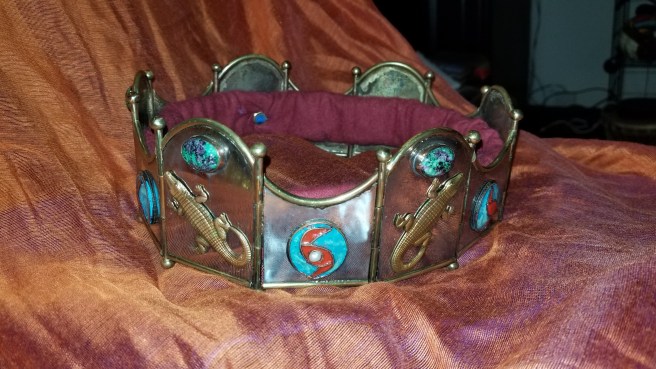
Here’s a similar scarf to what Konstantia is wearing above, only worn by me, in the most flattering selfie imaginable, that just happens to have the best shot of my turban style. It also gives a nice railing for coronets to perch without the pinching or headaches associated with some heavy head jewelry. Konstantia rocks the look complete with a maforion, or veil over top of it, which was common for the early period, versus the middle period, when I’m supposed to be living. She used a pashima here, for added thickness and warmth.


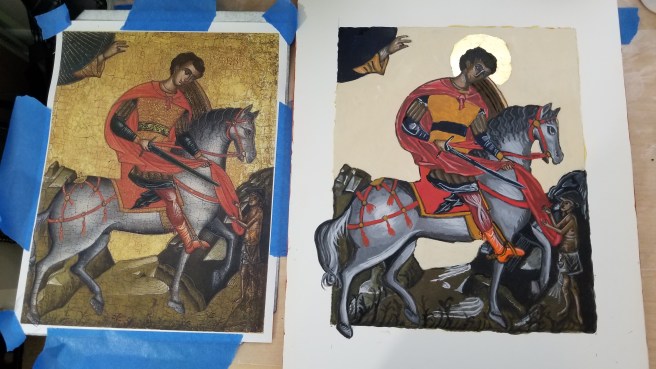
And here I am in some 11th Century, emulating looks from The Menologion of Basil II as seen in my master’s thesis and Compleat Anachronist.
![]()

It was requested that I do a video tutorial of my preferred turban wrapping, so, here it is:
I know the phrase goes, “All good things must come to an end”, but in short, that head roll was never good. It’s an early Faire/SCAbomination of garb based on Italian and Spanish Renaissance fashions that don’t fit in this culture, has seen its day, and needs to be retired for a more accurate solution. Consider the fakiolion for your next event, and put your donut out to garb pasture for good.


You must be logged in to post a comment.