
[Yes, the woman who named her site after a VNV Nation song just dropped a Wu Tang reference. Not even sorry.]
My husband has a huge head and a normal neck. Those of us who sew know what this means, it means a gaping maw of a neckline that shows off the Norman’s delicate ginger skin. And while it’s nothing a nice brooch and a gallon of sunblock can’t fix, it’s not -right-.
I’ll be posting soonish on dressing my husband in Byzantine, (yes, really, men’s garb, you heard it hear first), as well as including a new page on Norman Garb here on my site (*faints*) but I needed to reassess my approach toward fit.
During my short time in Caid, I had a discussion with a friend about necklines. American reenactors and re-creators make our necklines too big. After her visit to Scandinavia and meeting with Viking reenactors in the land of Where This Stuff Actually Happened, she gave me some tips on how to fix my stupidity.
I’m sure that this technique is known to a few people and I’m going to get a “WELL, DUH!” Gibbs Slap in the comments, but knowing also that there’s some derpy sewers out there who probably make the same mistakes I do, this post is important.
For the longest time, I’ve been following a formula given to me a while ago: You draw your neckline 3-4″ each way from the center point, 2″ down in the back, 4″ down in the front, and add a keyhole slit. This gives a lopsided oval effect with a shorter back than front, which is essential for comfort, but it’s just too wide around the neck. My husband’s head is 26″, his neck is 17″. He’s not a jacked guy, but he’s tall and broad, so making garb that doesn’t choke him has been a challenge.
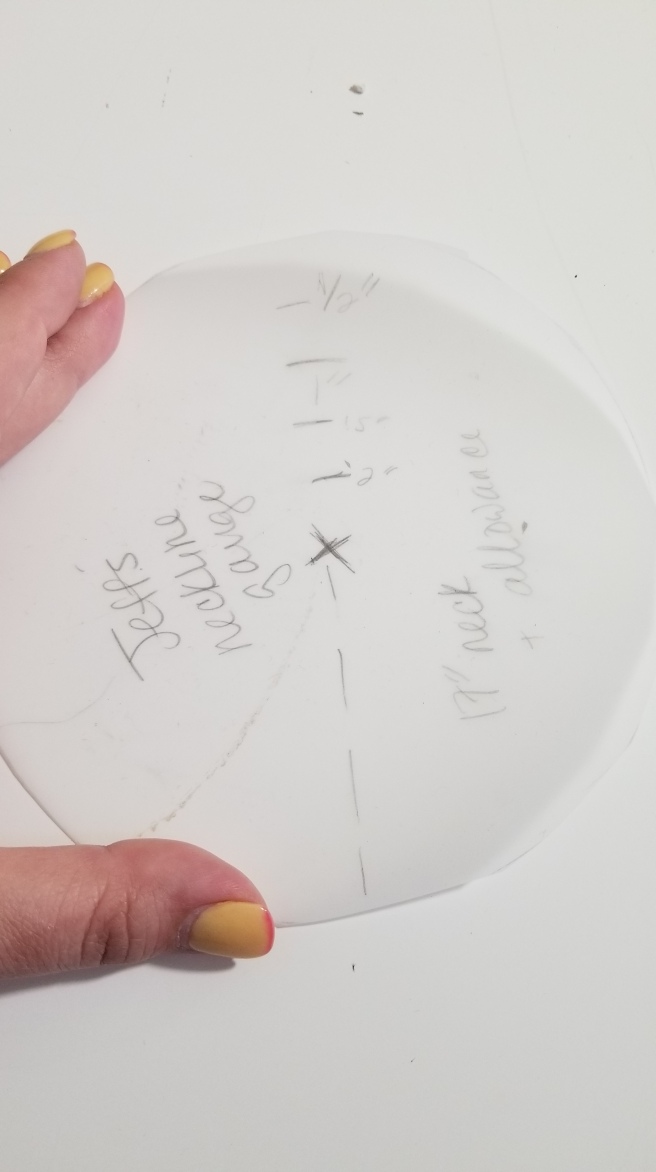
Here is my new hack: Neckline gauges.
A true circle with the circumference of our necklines (13.5″ for me, 17″ for him), marked up showing increments of 1/2″ from the back toward the center mark. Ignore where it says “+ allowance”, I tried that and it made it too big. Just go with the regular neck measurement, the hem or facing will take care of that ease.
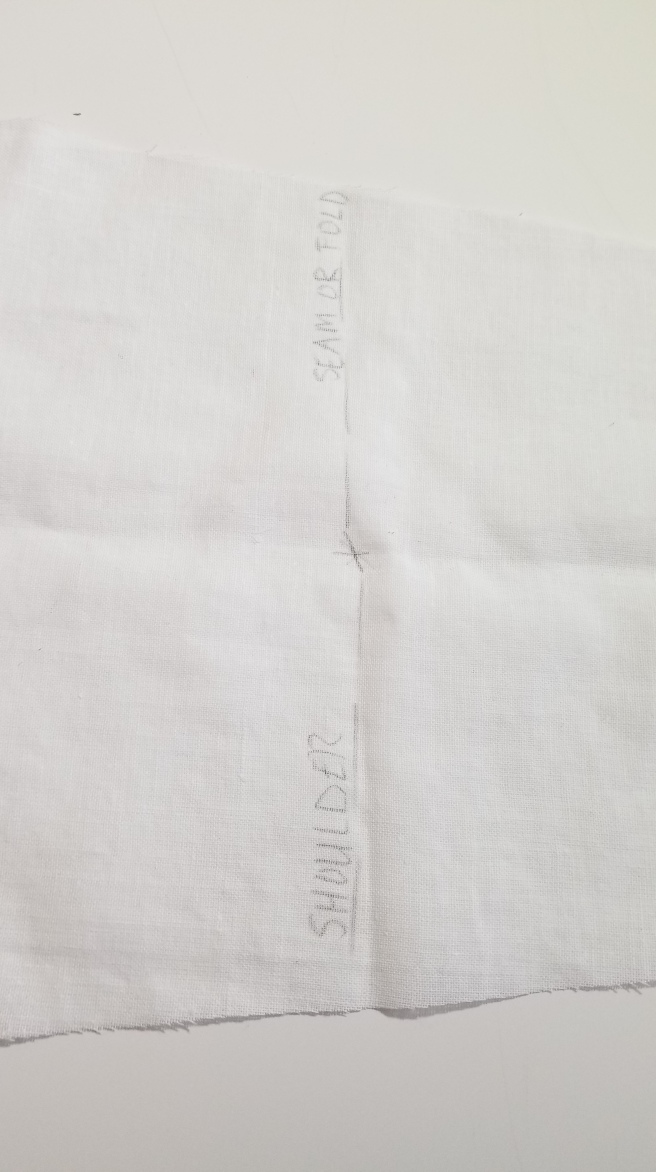
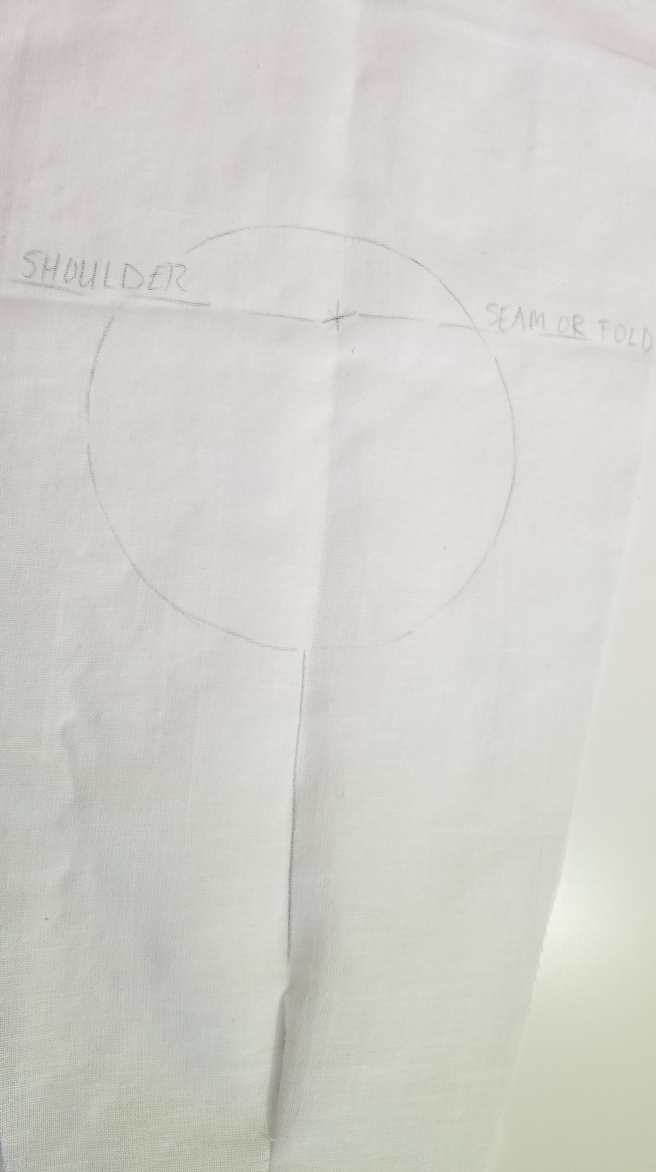
 You place the gauge on the fabric, center mark matching to the dead center of where you want the neckline to be. Then, move it forward to where you want the depth of the back to be. I’ve done both 1″ and 1.5″ with good results. The dotted line helps you maintain the angle toward the front, and where you can mark your slit.
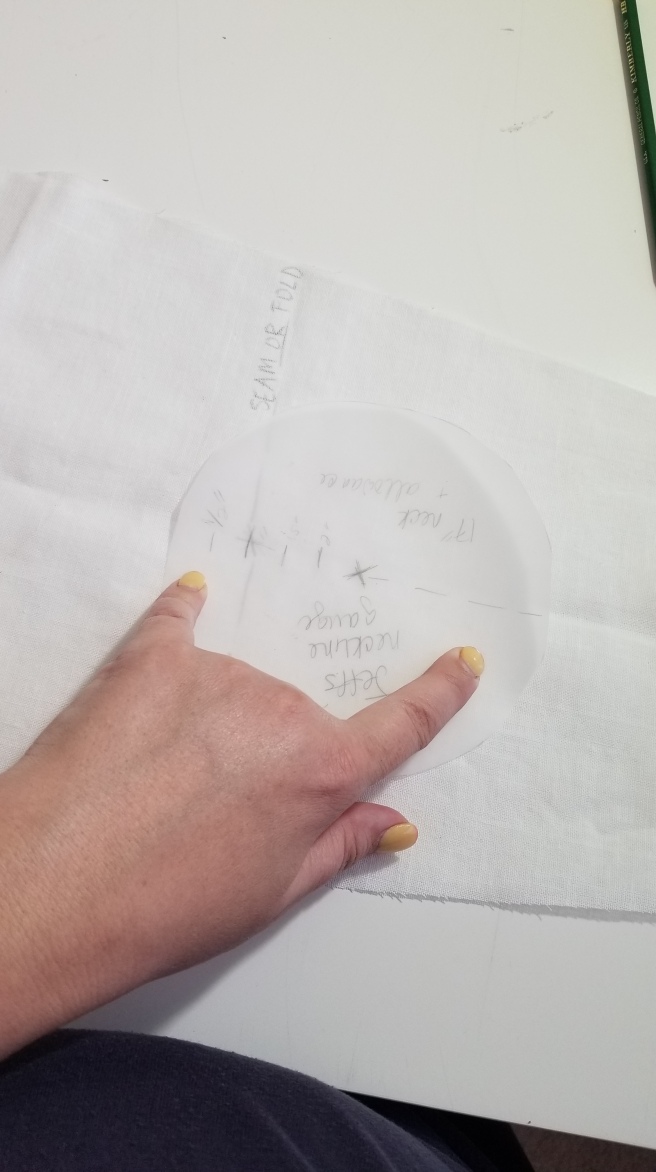
Here I am demonstrating it on a piece of scrap linen:

Give that a shot. Practice on a scrap and put it over your head. You should have a neckline that comes right up if not a bit above the clavicle, and looks more accurate. Voila!!
Clearly, a closed slit is vital to the tight necks in Byzantine artwork, but you never see the slit! What do we do?
We cover it, or move it to the side.
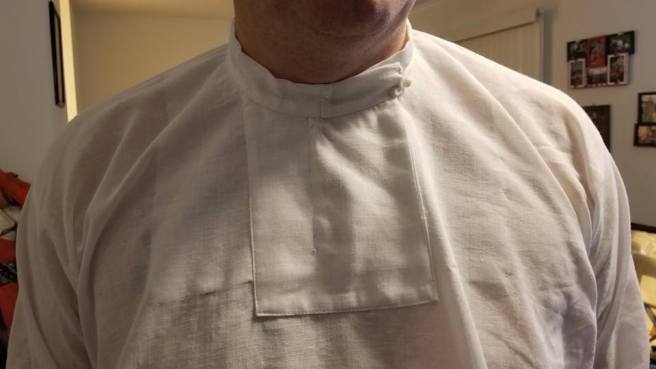
The Manazan Caves tunic covers the keyhole slit with a placket. And I was a a fool to not have tried to make one of these sooner. You can find a great walkthrough from the folks Downunder at Birka Traders here: http://members.ozemail.com.au/~chrisandpeter/manazan_shirt/manazan_instructions.htm
I’ve constructed this for my husband with great results, both with, and without the band collar. This is also where I learned to NOT ADD A SEAM ALLOWANCE ON THE NECKLINE. I’ll be posting a better walkthrough once I’m done with his new collection of tunics so I can discuss my experience using the pattern above.
The other option is to put the slit off-center. The most common is just down the left side of the neck, as seen in the Alb of the Holy Roman Empire, and the Palermo Tunicella. While both not “Byzantine” garments, the Eastern influence is evident.


Another option is to use the shoulder seam as the slit. You see that in the Met Tunic I have posted on (link), and I emulated that for my 12th Century Ensemble (link).
So the next time you’re at a loss, looking at source artwork and wondering why your necks don’t look right, give this idea a shot and try a variation for a new fit. I know I’ve been totally converted.

You must be logged in to post a comment.